You’ll recall that the stairway lighting project is well under way, with the presence detection phase completed and working well. The next phase in the project was to look at the available options for the lighting of the stairs themselves, so this is what I have been working on for the past three weeks or so!
As mentioned in previous blog posts, I’ve dabbled with RGB LED Lighting before and have built a couple of the the excellent JeeLabs LEDNodes quite some time ago. While these worked well, I had terrible trouble sourcing the common + (anode) LED strips that were required – at the time in the UK it seemed that common – (cathode) were widely available. I’d therefore only been able to pick up a metre or so for testing at that time, as opposed to several rolls of 5m of the common cathode type that were mistakenly purchased while seeking out the common anode type!
Since I’d already half-broken the 3rd Commandment by spending more than I really wanted to on the presence detection phase, I really wanted to try and bring the budget back under control as much as I could. This meant refraining from splashing out on any more LED strips if I could help it which ruled out using the LEDNodes. I’m sure I’ll end up using those in a future project though!
Fortunately I’d also recently discovered that I had a 5m roll of WS2801 5050 RGB LED strip in the spares cupboard. These really appealed to me as each LED is individually addressable, meaning that all manner of effects could be implemented should I desire. I also remembered reading that since these were 5V they could be easily driven from an Arduino, so I set about building a prototype for testing 🙂
I’ve messed about previously with Arduino boards and luckily have a load of stuff in the spares cupboard – boards, expansion boards (“shields”), all sorts – easily enough to get a good start with the prototype. I’ve also used the xAP Home Automation protocol on an Arduino previously using code that Derek has written over on the Home Automation Hub site. His code implements a pretty good xAP stack using the ENC28J60 chip based Ethernet shield which in turn uses the Ethercard library from JeeLabs. As an aside, if you’re looking for a completely self-contained xAP based Home Automation controller that has an absolute shed-load of functionality built in, you should definitely take a look at the HAH!
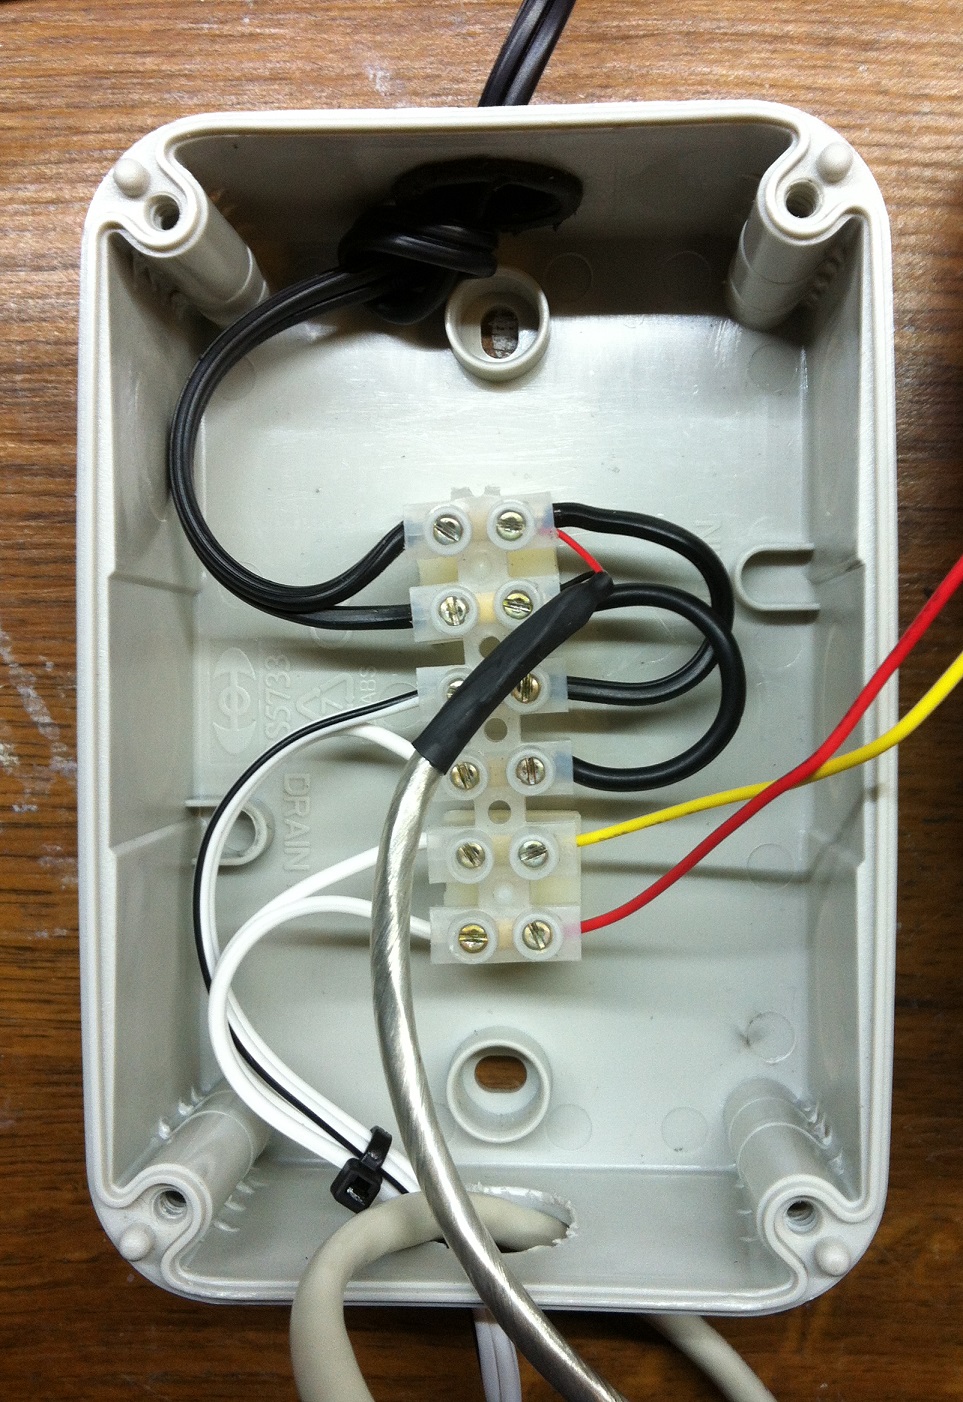
So it seemed that yet again I pretty much had all the pieces required to throw something together! And this is what I came up with:
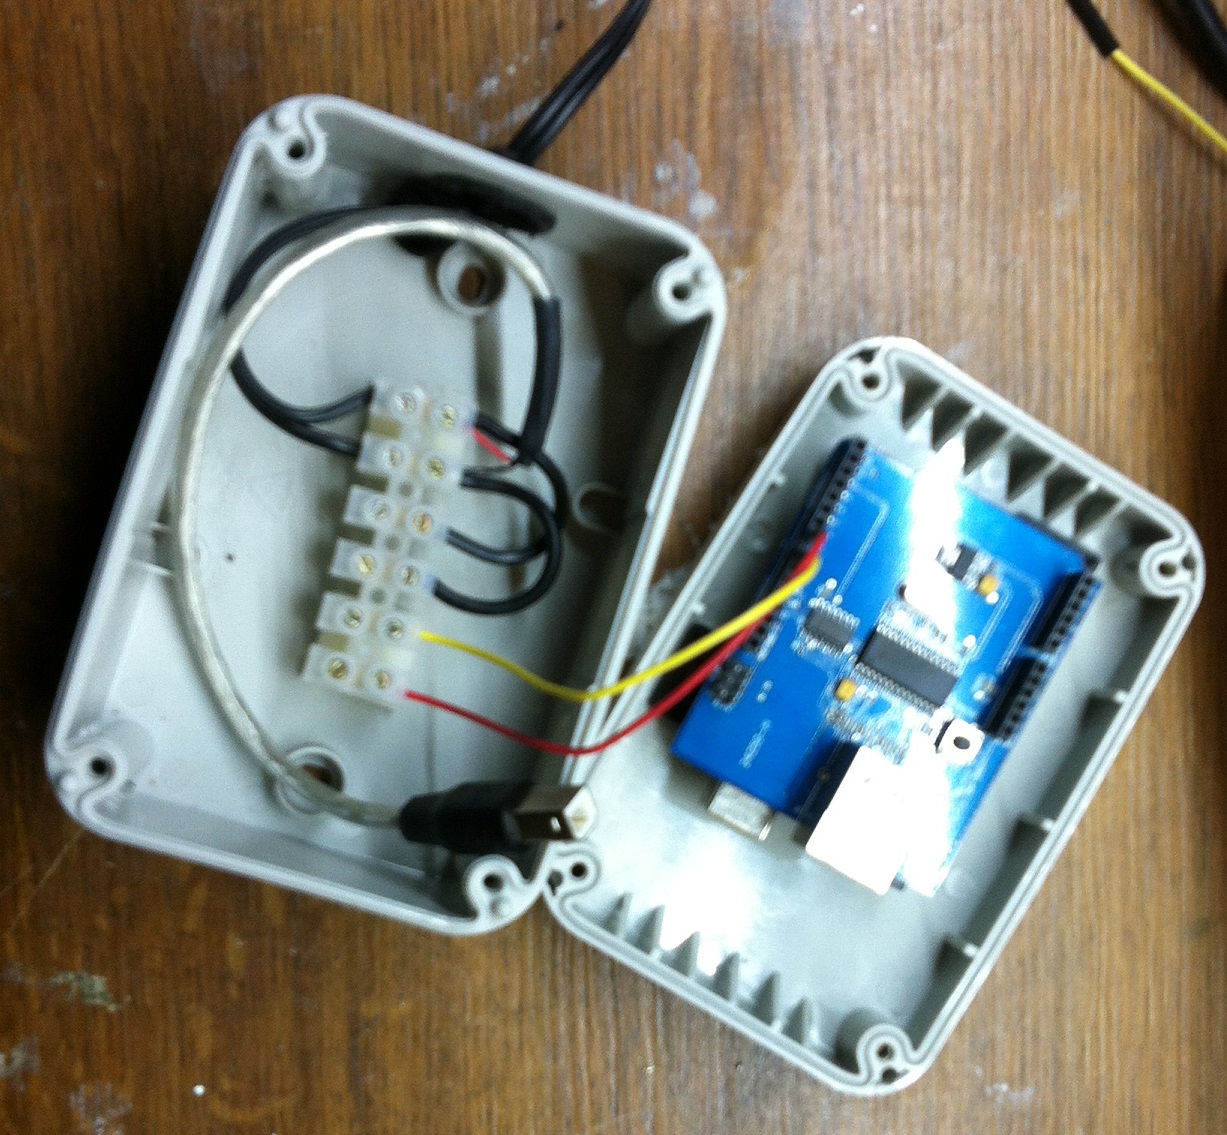
The enclosure is actually an IP66 box I had knocking around – it’s only a prototype at this stage so I’ll build the “production” version into a nicer looking case. I could also make the whole thing a lot smaller by moving it to an Arduino Nano and a smaller Ethernet module…… assuming I get as far as needing a production version!
The WS2801 5050 RGB LED strips are really easy to connect to and control from an Arduino. They only need + / – 5V, a clock and a data pin. You can use hardware SPI on an Arduino for the clock – on this particular Arduino SPI is on pin 13. As with most things on the Arduino platform, somebody else has already done the hard work and there’s an excellent library available called FastSPI_LED2 that makes it really easy to talk to a number of different types of LED strips!
I also discovered some really cool code called FastSPI2 LED FX that has a load of pre-defined effects for any LED strips supported by the FastSPI_LED2 library. Remember, “Thou shall not re-invent the wheel“!!
At this point though I did run into a slight problem, in that the Ethernet shield also uses the SPI bus and ties up pin 13. Fortunately though with the FastSPI_LED2 library you can specify a non-SPI pin for the WS2801 and it will just use software “acceleration” instead of hardware, so I used pin 7 for the clock and pin 8 for the data.
So, on with the build of the prototype! Since I was going to be using about 3.5 metres of LEDs, I needed a 5V 5amp psu. No problem with that, plenty in the spares cupboard and I figured that I could power the Arduino off it too with the LED strip connected directly instead of being powered through the Arduino.
Unfortunately I discovered another problem – the power input jack on the Arduino needs more than 5V, even though you can power the board from a 5V USB port? That seemed a bit strange and I started to look at bigger PSUs and some additional circuitry to step-down the voltage for the LED strip.
This started to sound more complicated than it needed to be! Then it occurred to me that I could just butcher a USB cable and give the Arduino 5V on the USB port like you would do by plugging it into a PC.
This seemed a much simpler arrangement!
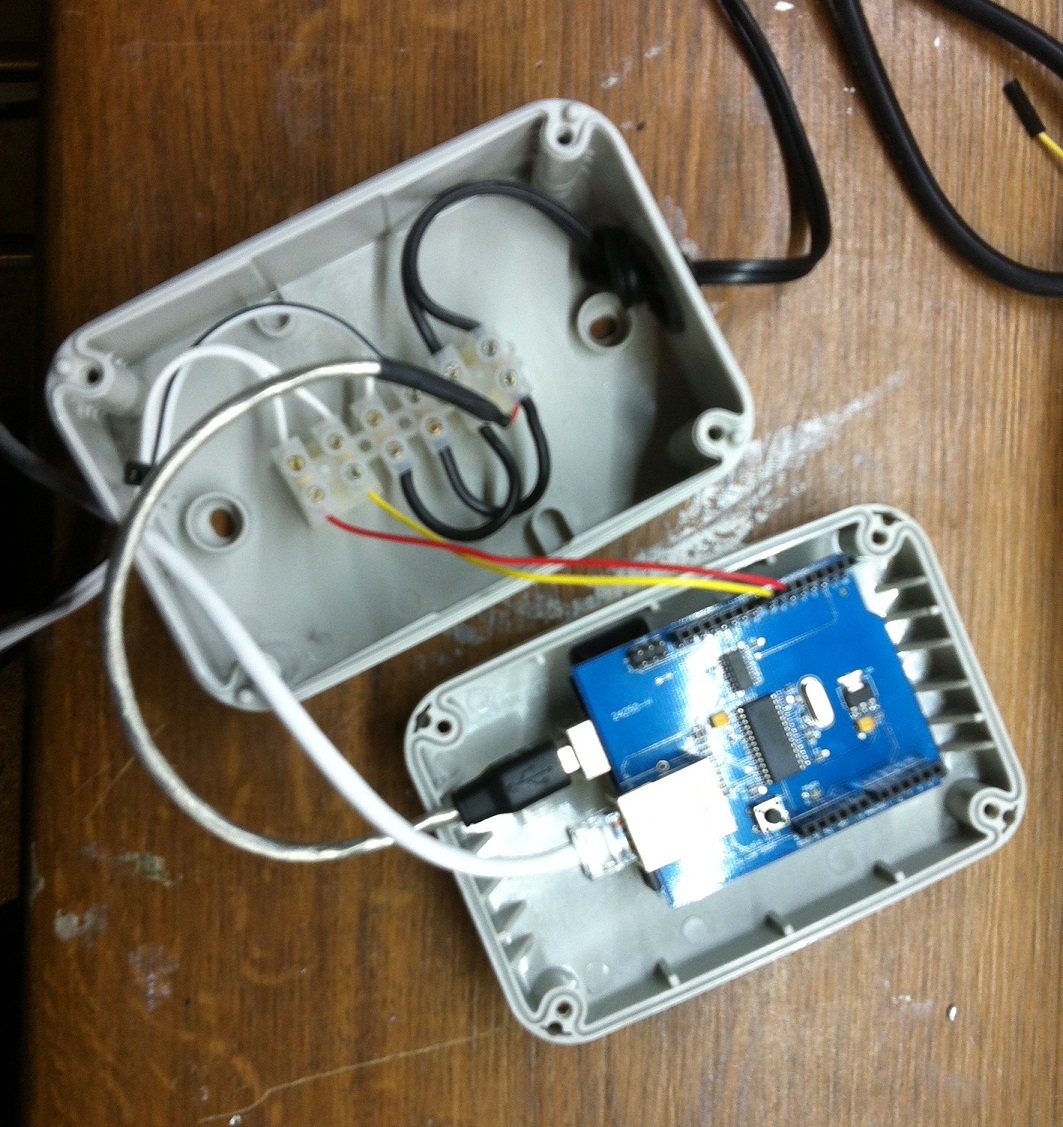
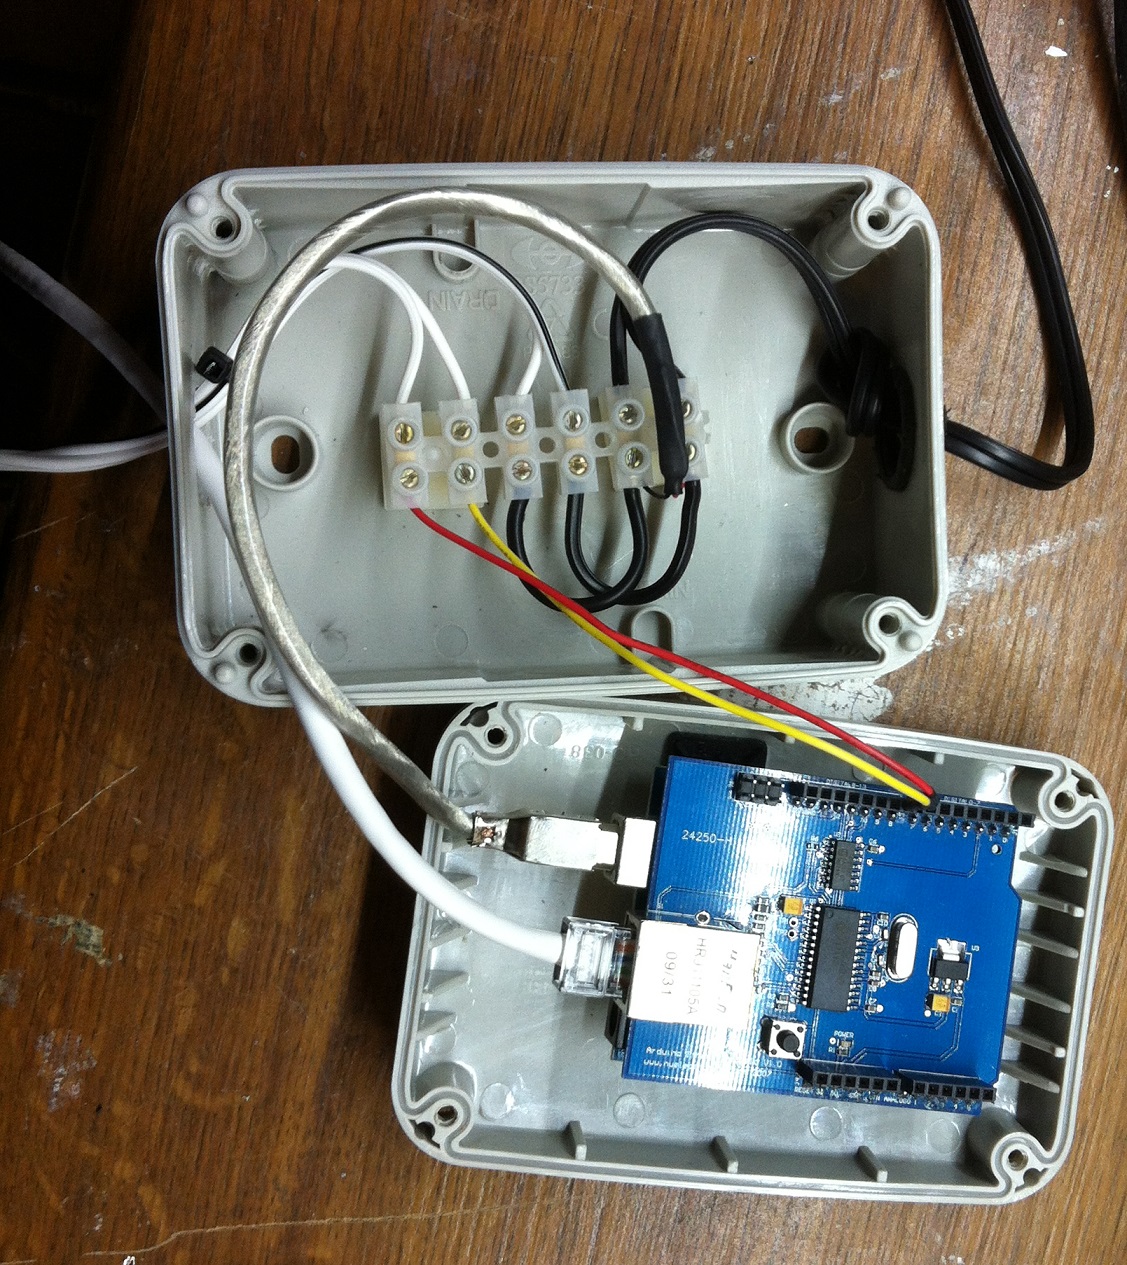
I did have to remove the plastic from the USB connector to allow the lid of the enclosure to shut though:

Once the hardware side was built, I could turn my attention to the software. I spent a few days impressing my kids with a meter strip of WS2801 LEDs “testing” all the different effects from the aforementioned FX code, while at the same time pulling together various bits of code.
I used the FX library as a base and added a xAP control layer instead of the original serial based one. Eventually I had a pretty good working prototype and could successfully control the LED strip using xAP messages that I could send from xAP Floorplan. It worked really well, I implemented a simple xAP Schema as follows:
.command

xap-header
{
v=12
hop=1
uid=FFCEEF00
class=fastspiled2.command
source=ahs.fastspiled2.ahsarduino1
target=ahs.fastspiled2.ahsarduino1
}
command
{
command=preset
mode=6
}

xap-header
{
v=12
hop=1
uid=FFCEEF00
class=fastspiled2.command
source=ahs.fastspiled2.ahsarduino1
target=ahs.fastspiled2.ahsarduino1
}
command
{
command=clear
}

xap-header
{
v=12
hop=1
uid=FFCEEF00
class=fastspiled2.command
source=ahs.fastspiled2.ahsarduino1
target=ahs.fastspiled2.ahsarduino1
}
command
{
command=reset
}

xap-header
{
v=12
hop=1
uid=FFCEEF00
class=fastspiled2.command
source=ahs.fastspiled2.ahsarduino1
target=ahs.fastspiled2.ahsarduino1
}
command
{
command=hsvallcolour
colour=255
}

xap-header
{
v=12
hop=1
uid=FFCEEF00
class=fastspiled2.command
source=ahs.fastspiled2.ahsarduino1
target=ahs.fastspiled2.ahsarduino1
}
command
{
command=hsvall
hue=200
saturation=200
value=200
}

xap-header
{
v=12
hop=1
uid=FFCEEF00
class=fastspiled2.command
source=ahs.fastspiled2.ahsarduino1
target=ahs.fastspiled2.ahsarduino1
}
command
{
command=rgball
red=255
green=255
blue=255
}

xap-header
{
v=12
hop=1
uid=FFCEEF00
class=fastspiled2.command
source=ahs.fastspiled2.ahsarduino1
target=ahs.fastspiled2.ahsarduino1
}
command
{
command=brightness
brightness=255
}

xap-header
{
v=12
hop=1
uid=FFCEEF00
class=fastspiled2.command
source=ahs.fastspiled2.ahsarduino1
target=ahs.fastspiled2.ahsarduino1
}
command
{
command=delay
delay=255
}

xap-header
{
v=12
hop=1
uid=FFCEEF00
class=fastspiled2.command
source=ahs.fastspiled2.ahsarduino1
target=ahs.fastspiled2.ahsarduino1
}
command
{
command=step
step=2
}

xap-header
{
v=12
hop=1
uid=FFCEEF00
class=fastspiled2.command
source=ahs.fastspiled2.ahsarduino1
target=ahs.fastspiled2.ahsarduino1
}
command
{
command=hue
hue=255
}

xap-header
{
v=12
hop=1
uid=FFCEEF00
class=fastspiled2.command
source=ahs.fastspiled2.ahsarduino1
target=ahs.fastspiled2.ahsarduino1
}
command
{
command=saturation
saturation=255
}

xap-header
{
v=12
hop=1
uid=FFCEEF00
class=fastspiled2.command
source=ahs.fastspiled2.ahsarduino1
target=ahs.fastspiled2.ahsarduino1
}
command
{
command=value
value=255
}

xap-header
{
v=12
hop=1
uid=FFCEEF00
class=fastspiled2.command
source=ahs.fastspiled2.ahsarduino1
target=ahs.fastspiled2.ahsarduino1
}
command
{
command=rgb
led=0
red=255
green=255
blue=255
}

xap-header
{
v=12
hop=1
uid=FFCEEF00
class=fastspiled2.command
source=ahs.fastspiled2.ahsarduino1
target=ahs.fastspiled2.ahsarduino1
}
command
{
command=hsv
led=0
hue=200
saturation=200
value=200
}
The xAP Schema pretty much mirrored the commands that were originally available in the FX library and allowed a lot of flexibility in controlling the LEDs. It’s simple and effective and the Arduino responds with:
.response

xap-header
{
v=12
hop=1
uid=FFCEEF00
class=fastspiled2.response
source=ahs.fastspiled2.ahsarduino1
}
response
{
success=1
status=1
freeram=111
freecount=55
}

.error

xap-header
{
v=12
hop=1
uid=FFCEEF00
class=fastspiled2.error
source=ahs.fastspiled2.ahsarduino1
}
error
{
error=reset
freeram=135
freecount=55
}
Since I wanted to use these LED strips for lighting the stairs, I implemented a couple of my own effect patterns that were more appropriate. I came up with a “chase”, where each LED is lit in turn from top to bottom or bottom to top depending on whether you are walking up or down the stairs. This was followed by a “fade up” from nothing to full brightness.
So with the Arduino based controller and software at a decent “beta” stage, I then moved on to looking at where and how I could install the LED strips on the stairs. There were several options, but I really needed to try some different positions to see what the lighting patterns and coverage would look like before I committed to drilling holes!
With that in mind I broke out the tie wraps and lashed 3m of LED strip to the upper bannister railing. This gave pretty good coverage:
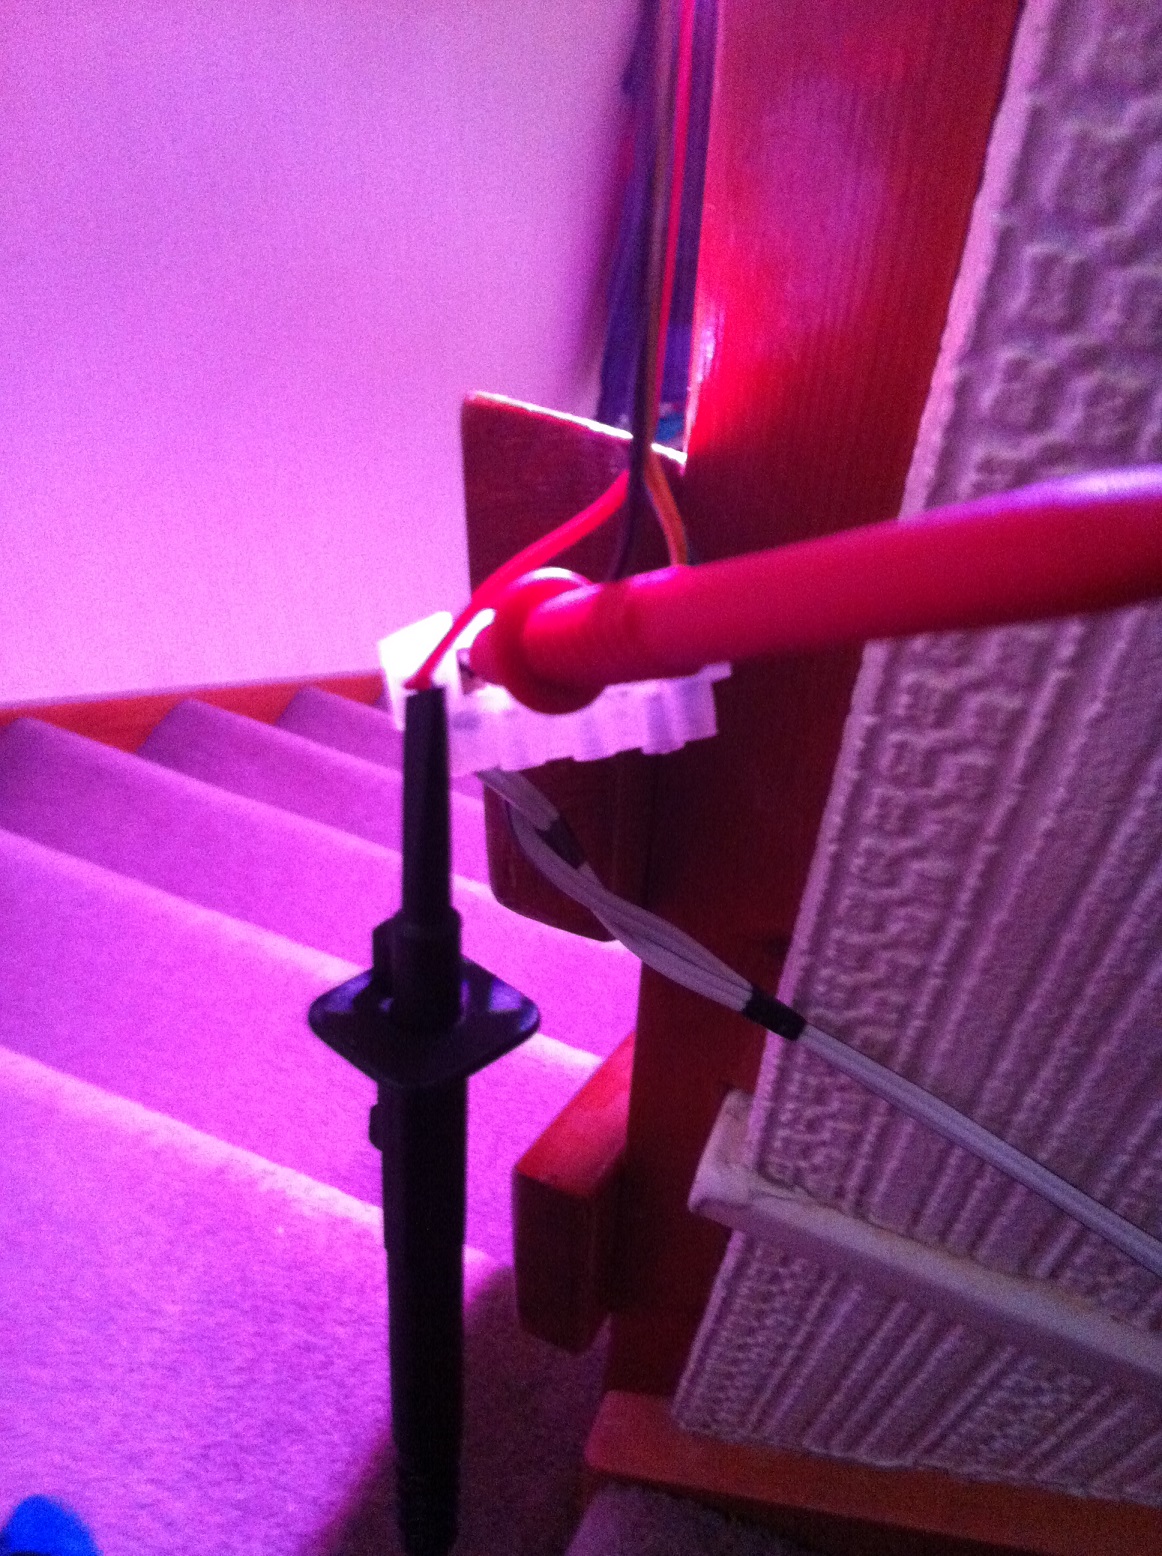
While I was playing around, I also took some measurements with a multi-meter to see how much power the 3m of LED strip would be using. At full RGB brightness, or “white”, they were using 2.42 Amps.
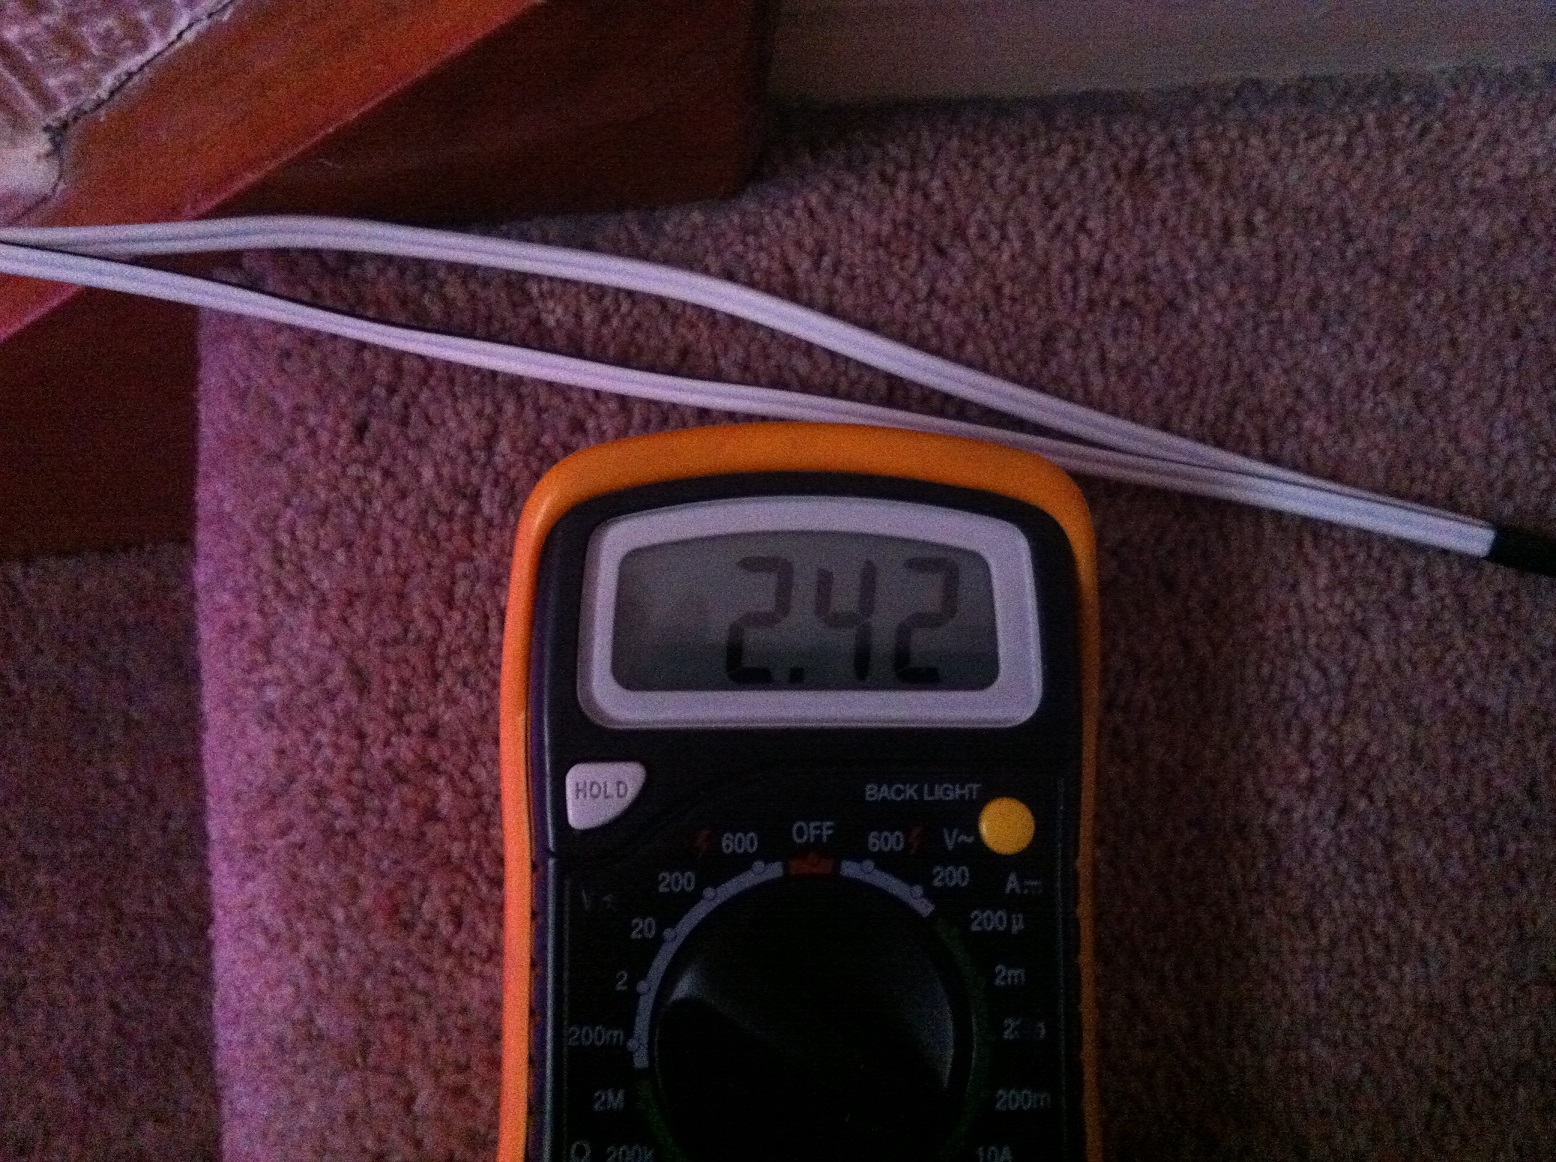
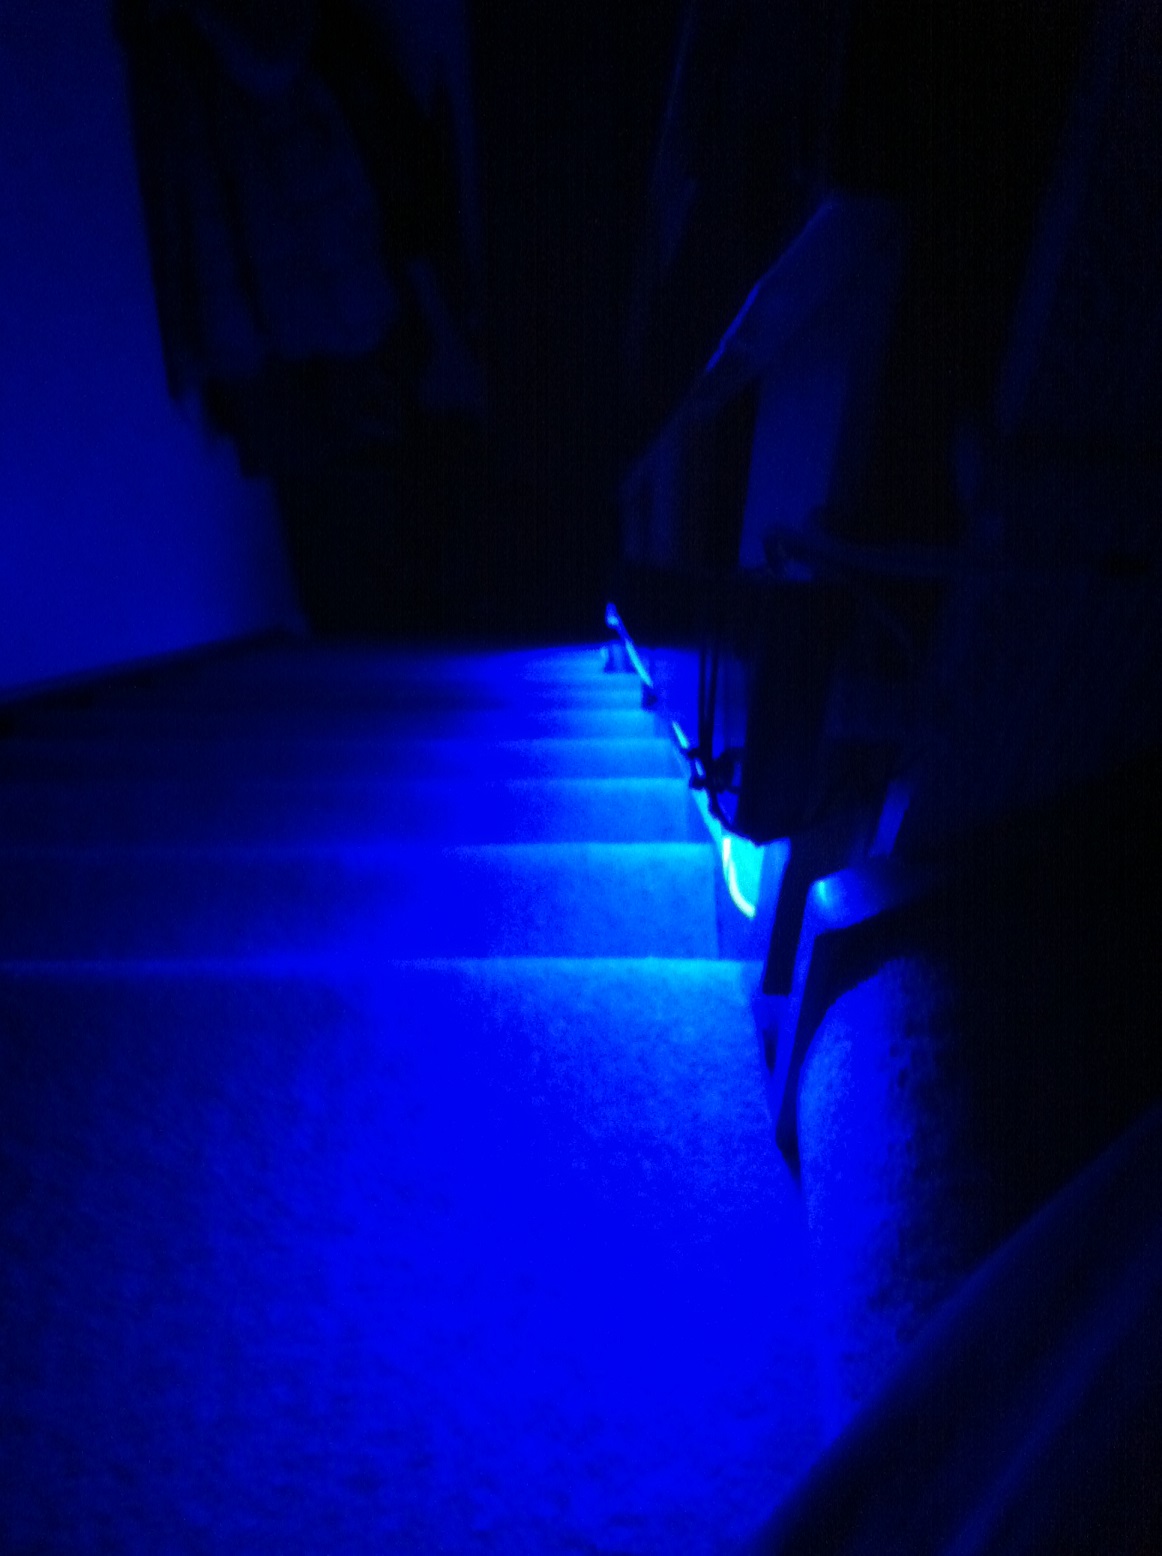
During my previous testing with my kids, we’d sort of settled on a blue-ish colour, so this was tested too:

A much more respectable 0.62 Amps.

I wasn’t quite happy with the placement of the LED strip though, so I remounted it lower down:


Hmmm, more testing needed I think. It’s going to be difficult to strike a balance between getting a decent coverage and mounting the LED strips unobtrusively 🙁
So I finished up the integration with the rest of my Home Automation system, with the plan then being to see how all this behaved in “real life” before pushing ahead with a final installation.
You’ll remember that I’d already got the presence detection side working well, so it was a simple matter of tweaking the previous scripting in xAP Floorplan to tie everything together. There needed to be some simple logic implemented as follows:
- The lighting should only come on at night
- Stepping on the bottom stair should trigger the “up” effect
- Stepping on the top stair should trigger the “down” effect
- Re-triggering should be prevented
- The lighting should be turned off after 1 minute
- If the bottom or top stair is stepped on during the 1 minute that the lighting is on, the 1 minute should start again
This was easy to do:
- check if it’s night time
- check if a timer exists
- if no timer exists, turn on the lighting (“up” when the bottom stair mat sensor is triggered, “down” when the top stair mat is triggered) and create a new timer that turns off the lighting after 1 minute
- if a timer exists, cancel it and create a new timer to turn off the lighting after 1 minute
In xAP Floorplan this is incredibly simple:
stateDayNight = getdbglobal("DayNight")(0)

If stateDayNight = "night" and stateDevice = "on" and strRoom = "Downstairs Hall" and strDevice = "Stair Mat Magnetic Contact Sensor" and Not checktimer("Script : StairLightingOff")(1) Then

	sendxAPFastSPILED2Preset 32, "ahs.fastspiled2.ahsarduino1"

	'start new turn off timer
	addtimer "StairLightingOff", DateAdd("n", 1, Now()), "", "Sub Main()" & vbcrlf & "ScriptRun ""StairLightingOff""" & vbcrlf & "End Sub"

ElseIf stateDayNight = "night" and stateDevice = "on" and strRoom = "Downstairs Hall" and strDevice = "Stair Mat Magnetic Contact Sensor" and checktimer("Script : StairLightingOff")(1) Then
	'delete existing turn off timer
	deletetimer "Script : StairLightingOff"

	'start new turn off timer
	addtimer "StairLightingOff", DateAdd("n", 1, Now()), "", "Sub Main()" & vbcrlf & "ScriptRun ""StairLightingOff""" & vbcrlf & "End Sub"

End If

If stateDayNight = "night" and stateDevice = "on" and strRoom = "Upstairs Hall" and strDevice = "Stair Mat Magnetic Contact Sensor" and Not checktimer("Script : StairLightingOff")(1) Then

	sendxAPFastSPILED2Preset 33, "ahs.fastspiled2.ahsarduino1"

	'start new turn off timer
	addtimer "StairLightingOff", DateAdd("n", 1, Now()), "", "Sub Main()" & vbcrlf & "ScriptRun ""StairLightingOff""" & vbcrlf & "End Sub"

ElseIf stateDayNight = "night" and stateDevice = "on" and strRoom = "Downstairs Hall" and strDevice = "Stair Mat Magnetic Contact Sensor" and checktimer("Script : StairLightingOff")(1) Then

	'delete existing turn off timer
	deletetimer "Script : StairLightingOff"

	'start new turn off timer
	addtimer "StairLightingOff", DateAdd("n", 1, Now()), "", "Sub Main()" & vbcrlf & "ScriptRun ""StairLightingOff""" & vbcrlf & "End Sub"

End If
This has been working pretty well overall, but I’ve had quite a few reliability issues. There appears to be a problem with the networking side of things on the Ethernet shield. Basically, at seemingly random intervals all inbound networking seems to stop, but outbound appears to carry on working ok.
I’m not entirely sure what is causing this, whether it’s my code, the Ethercard library or a genuine hardware fault on the Ethernet shield (I swapped this out several times as well). I do have a *very* busy xAP network, over 800 messages a minute at times – so it’s possible the Arduino just can’t keep up. Unfortunately with xAP every message has to be processed to at least check the target and schema fields before deciding what to do with the rest of the message.
I did add several workarounds though, I implemented a hardware watchdog so that the Arduino would reset should it stop responding for more than 4 seconds. I also made it so that if an inbound xAP message had not been processed for 30 seconds, assume that the network has died and reboot too. I also messed about optimising the code I’d written as best as I could based on several blog articles such as this.
These changes all improved things massively, the prototype became a lot more reliable and has been working very well. But….it’s not 100% reliable 🙁 Occasionally the Arduino will be “mid-reset” following a watchdog or network time-out just when somebody is walking up or down the stairs – no lights come on = FAIL! Or, due to the UDP nature of xAP the Arduino will miss a message from xAP Floorplan telling it to execute a pattern – no lights come on = FAIL! The 7th Commandment needs to be satisfied here “Thou shall not attract the wrath of others“!
Oh well, it is a prototype after all 🙂 So I’ll persevere for a bit, play around with the code some more and experiment a bit more with the positioning of the temporarily tie-wrapped LED strips 🙂
In the meantime, best get the Fibaro RGBW Controller out of the box and start reading up on that, ready to try a different approach!
If you’re interested in the code I’ve written, you can download it below:
Thanks for reading,
Martyn Wendon
One thought on “Project Disco Stairway Lighting Is A Go – xAP, Arduino and WS2801 5050 RGB LED Light Strip Prototype”