For many years now I’ve been using the excellent JD’s Auto Speed Tester (or JDAST) software for monitoring my Internet connection. It’s a fantastic tool for performing regular Internet speed tests in the background and logging all the results for later viewing and comparison.
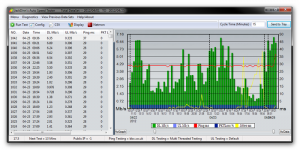
Unfortunately, when I recently moved a bunch of stuff to the Cloud, the Windows VM that JDAST was running on was due to be retired, so I had to find an alternate solution. Whatever I chose needed to be able to be run on Linux and be capable of running headless with no GUI, maybe with some sort of web based way to view the collected data.
I hunted around and found there wasn’t really anything suitable. I tried a couple of Cacti based scripts, but my install of Cacti now runs on a Raspberry Pi and while it’s great for SNMP based data, anything that requires shelling a script soon has it slowing to a crawl. Even after optimising the Cacti install using some tips found on this blog post, I was still having problems with anything that needed to run an external script to pull in data. That’s one of the reasons I moved all of my environmental and utility data logging to Emoncms since that’s much better suited for that type of data as data is “pushed” to it.
One of the Cacti scripts I tried was based on pulling in the results gathered from a Python command line tool called speedtest-cli. There’s plenty of blog posts around detailing how to use this great tool such as this. During testing I found that the script struggled to run on a Pi and it gave wildly inaccurate results. I suspected that the Pi just didn’t have enough grunt to be able to do the network timing calculations so I moved it to a Linux VM. The results were much better – a quick cron job later and it was logging a test result to a text file every 30 minutes.
I ran it like that in parallel with JDAST for a week or so, keeping a close eye on the results. Overall it pretty much matched what JDAST was logging during that period, so I was pretty chuffed with it.
Unfortunately though, logging the results to a text file wasn’t going to be much good for me as I really wanted a way I could visualize and compare the data, like I could with JDAST. The Cacti scripts I tried could pull the results out of the text file for logging in Cacti, but as I mentioned earlier, shelling scripts is a bit risky on my Cacti install nowadays.
I toyed with the idea of logging the results from the text file to a MySQL database using a perl script, or modifying speedtest-cli to do that, then writing a CGI script to stick on one of my Linux Apache or Lighttpd web servers to display graphs and such like. But that sounded like a lot of work!
And this is where running a modular Home Automation system such as mine really helps to make problems like this easily solvable! Giving it some more thought over the space of a week or so, I realised I already had the key components for pulling a solution together:
- speedtest-cli – obviously
- xAP Floorplan – my install of this is backed by a MySQL datastore and it’s easy enough to process and log the contents of a xAP or xPL message to a database table
- xAP MQTT – a xAP to MQTT gateway, once the data is in MQTT I could easily process it from there
- Emoncms – I already have this in the Cloud, no better way to visualize this sort of data
- MySQL to Emoncms gateway – I wrote this a while back during my Cloud adventures. It pulls data from my xAP Floorplan database and posts it to Emoncms at regular intervals
I discounted the MQTT route since it didn’t seem to make sense to go from speedtest-cli to xAP to MQTT to then have to write something further to go from MQTT to a database or to Emoncms directly. So I decided on the xAP to database route via xAP Floorplan and the only thing really missing was getting the results from speedtest-cli into a xAP message. The rest of it was mainly configuration, add a few variables here, tweak a few existing scripts there….
I won’t go into too much detail about the xAP protocol here, there’s plenty of information about that elsewhere. In situations like this, a full xAP application isn’t really required – all I need is just to blast a xAP message over the network every time speedtest-cli runs. This is pretty trivial in most languages and Python is no exception:
def xap(ping,dlspeed,ulspeed):
s = socket.socket(socket.AF_INET, socket.SOCK_DGRAM)
s.setsockopt(socket.SOL_SOCKET, socket.SO_BROADCAST, 1)

msg="""xap-header
{
v=12
hop=1
uid=FF968200
class=speedtest.test
source=ahs.speedtest.ahscctvserver
}
test.result
{
ping=%s
download=%s
upload=%s
}
"""
s.sendto(msg % (ping, ((dlspeed / 1000 / 1000) * 8), ((ulspeed / 1000 / 1000) * 8)), ('<broadcast>', 3639))
Since this is for my own internal use only, there’s no real need to look at coming up with a fully specified message schema – I only need three pieces of information, the ping time, the download speed and the upload speed.
With the speedtest-cli script modifications completed, it was simple to add the appropriate configuration to xAP Floorplan:
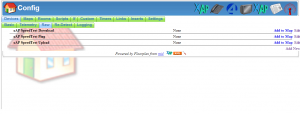
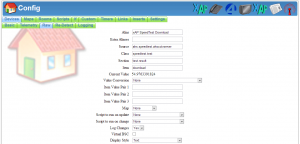
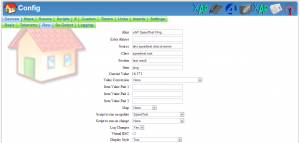
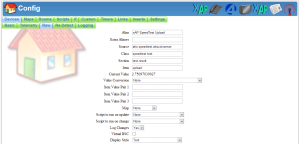
A super simple script was needed too, you can see how it’s connected in the “Ping” device screen capture above. Six lines of actual code are all that’s needed to have xAP Floorplan log the data for the Speedtest result into it’s MySQL database:
Sub Main()

'get values
ping = getvalue("xAP SpeedTest Ping")
download = getvalue("xAP SpeedTest Download")
upload = getvalue("xAP SpeedTest Upload")

'set db global variable
SetGlobalDB "SpeedTest", "speedtestping", ping, true
SetGlobalDB "SpeedTest", "speedtestdownload", download, true
SetGlobalDB "SpeedTest", "speedtestupload", upload, trueEnd Sub
And due to the way I’ve written my Emoncms gateway (which I’m sure I will eventually get around to writing a blog post about) it was just as simple to add the Speedtest data to the submission queue by adding to the existing configuration:
'3' => {'name' => 'unknown', 'dbhost' => 'ahsappserver.aceshigh.local', 'db' => 'floorplan', 'dbuser' => 'xxxx', 'dbpassword' => 'xxxx', 'dbtable' => 'xap_floorplan_globals', 'dbnamefield' => 'gname', 'dbemoncmsnamefield' => 'gname', 'dbdatafield' => 'detail', 'dbwherefield' => 'gname', 'dbwherevalue' => 'speedtestupload', 'emoncmshost' => 'emoncmshost', 'emoncmsuser' => 'xxxx', 'emoncmspassword' => 'xxxx', 'emoncmsapikey' => 'xxxx', 'emoncmsnodegroup' => '13', 'emoncmsname' => 'unknown', 'currentvalue' => '0', 'previousvalue' => '0', 'lastqueried' => '0'}
So the process is now:
speedtest-cli -> xAP message -> xAP Floorplan -> MySQL
MySQL -> Emoncms Gateway -> Emoncms
And here are the results:
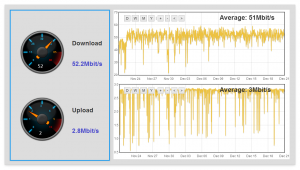
Overall this is now working really well, it’s obviously not quite as detailed as the logging that JDAST does, but it will suffice for my needs. After I finished migrating the rest of the functions off of that Windows VM (my mail server spam / firewall gateway) I was able to successfully retire it as part of my Cloud strategy.
You can download the modified speedtest-cli below:
Thanks for reading,
Martyn Wendon
One thought on “xAP Speedtest – Internet Speed Monitoring (I Love It When A Plan Comes Together!)”