Many years ago we asked our water supply company to install a Water Meter, so that we would be charged for “actual” usage, rather than what they estimated we used. This was duly installed and has saved us a lot of money on our water bills every month.
The one downside is that during the warmer / hotter months, we aren’t able to be as liberal with our use of tap water in the garden. We have a reasonable sized garden with a lot of planted areas as well as a number of plant pots and baskets. So over the following years we installed a number of water butts to store rainwater for using at a later time.
This has worked well, we currently have 9 water butts with a total capacity of nearly 2000 litres! Last summer was a pretty dry one and the water butts lasted all the way through. It’s amazing how quickly even a large water butt will fill up even when it’s only collecting water off the roof of a small shed!
And this is one of the small problems that has been on the to-do list for quite some time, being alerted in some way when any of the water butts is full. This is important since the large majority of water butts we have are “standalone”, i.e. they don’t connect back to a drain or soak-away. So when they are full up they just overflow, wasting water and making the ground around them sodden and damp, encouraging moss growth. An alert of some description would allow water to be piped off from a full water butt into one that isn’t yet full, or would be a nice prompt to install another water butt 🙂
So this blog post will go into some detail about how I solved this problem using some Visonic Magnetic Contact Switches (MCS) and some cheap “fish-tank water level” sensors I picked up off eBay for about £2 each! I did toy with going the Z-Wave route by using a Fibaro Universal Door & Window Sensor, like I did with the recent stair lighting project. But that would have started to get expensive and I already had some of the Visonic MCS in the spares cupboard 🙂
I’ve posted before about why a modular Home Automation system is so beneficial when it comes to these sorts of problems, as typically most of the parts for the solution to any particular problem will already be in place.
In this case, I’m already using several of the excellent RFXCom Transceiver LAN Gateways coupled with xPLRFX (long abandoned by the author but still going strong!) to bring Visonic, Oregon, HomeEasy, Byron and various other sensors onto the xPL network. xAP Floorplan has an xPL <-> xAP bridge in it and translates the xPL messages into their xAP equivalents in most cases. Since I’ve been using this set-up for many, many years now, it’s pretty easy to add a new sensor and tweak the existing logic to process and react to data from the new device.
On to the techie stuff then! The first water butts to be given the monitoring treatment are a set of 4 that are filled off of the guttering from a small 6ft x 4ft shed on the patio outside our kitchen. It’s a roof peaked on two sides, so the gutter pipe from each side goes into one 200 litre water butt on that side. The overflow connection from each of those water butts then goes into a further water butt on each side respectively. The “primary” water butt overflows into a “secondary” water butt, so in this case I needed to monitor just 2 out of the 4 water butts.
As mentioned above, I’d already picked up a dozen or so of these float sensors:
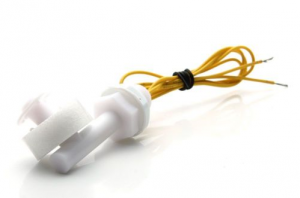
These can work either in N/O (normally open) or N/C (normally closed) mode simply by changing which way up they are mounted, so I knew that they would be usable as an input on an MCS. I initially thought that I would need to use one MCS per water butt, but since the Visonic I was planning on using has both a reed switch (it’s main input) and an “auxiliary” (AUX) input, I knew that I could just use one for these particular water butts.
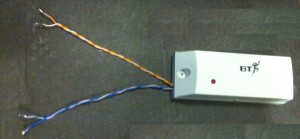
I set about modifying one of the MCS by removing the reed switch and adding some wiring to extend the connections out of the case:
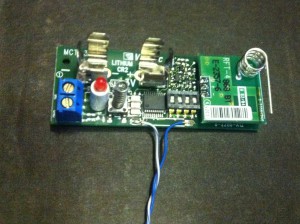
This is pretty simply stuff really, just a case of carefully stripping the board out of the plastic case, de-soldering the reed switch and soldering on some wires – I just used some twisted pairs from some CAT5 I had laying around.
The screw terminals at the end are for the AUX input:
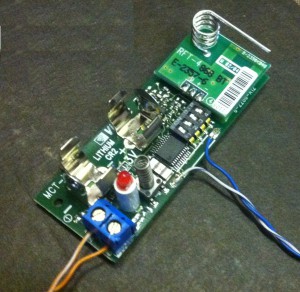
Then it’s a simple matter of re-assembling it into the case, routing the cables so that they don’t get squashed or pinched:
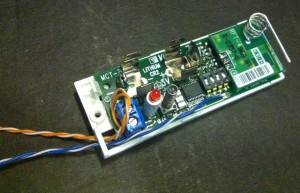
And finally, the ends of the cables have been “tinned” with solder, ready for connection:
Next up was the install of the float sensors into the water butts themselves. Again, this was fairly simple, just a case of drilling out a pre-existing grommet hole, fitting the float sensor and sealing it in with a good dollop of silicon.
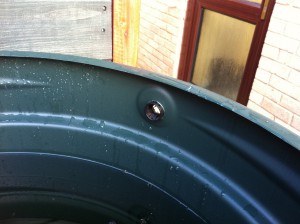


Mounting the float sensor this way up:
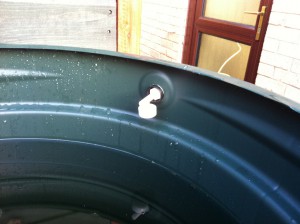
…gives a N/O connection and since I wanted an N/C connection I simply turned it up the other way:
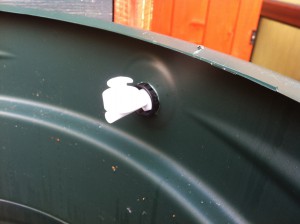
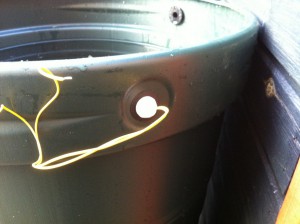
I’d already decided that I’d be mounting the MCS itself inside the shed – I’ve “waterproofed” these before to allow them to be used externally, but in this case it made sense to install it in the shed. Since I needed to connect both float sensors to it too, it also made for easier wiring.
Some external grade CAT5 and heat shrinking was used to make the connections – I used 2 twisted pairs for each of the yellow cables on the float sensors. Probably didn’t need to, but I couldn’t see a reason not to and it made for neater cabling:
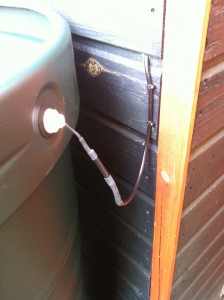
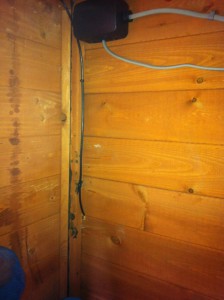
One water butt down, one to go, so same process again:
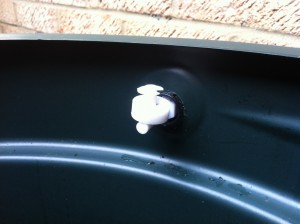
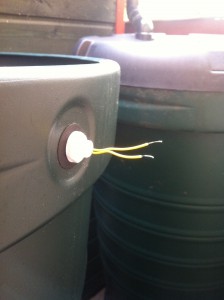
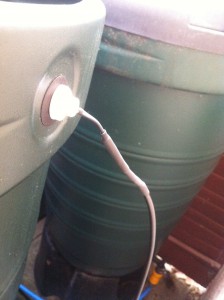
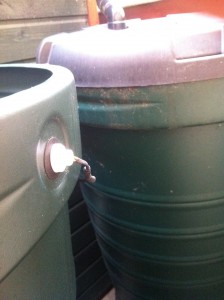
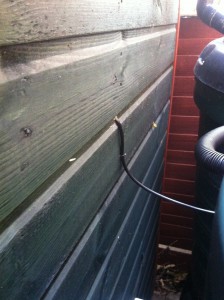
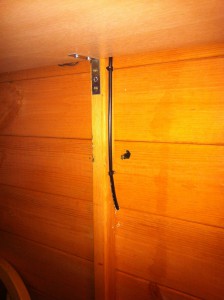

At some point in the future I’ll get round to lining out the inside of this shed, like I’ve done with all the others, so eventually all the cabling that’s on view will be hidden away – it’s on the to-do list, honest!
The final part of the hardware install was to add the MCS itself, again pretty simple to do. Since the cabling is nice and protected from the elements inside the shed I just used some chockblock to connect things up:
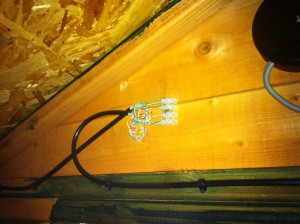
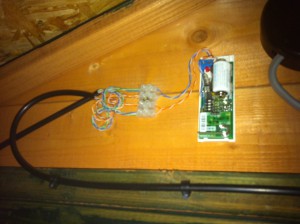
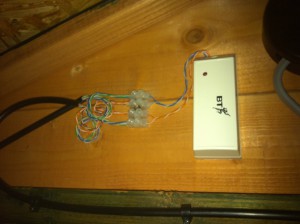
Testing the hardware side was a simple case of lifting each float sensor to the top and watching the red LED on the MCS to confirm it flashed.
The software part was just as simple. Adding a sensor to the xPLRFX configuration is carried out be editing the config.xml file:
<Device numbits="0x24" address="0x00XXXXXX" protocol="VisonicPowerCode" type="Sensor"><Config type="security"><Address>0x00XXXXXX</Address><RFType>VisonicPowerCode</RFType><DeviceType>MagneticContact</DeviceType><xPLSend>true</xPLSend><xPLName>Shed1WaterButtsLeft</xPLName><Room>Right Garden</Room><Floor>Ground</Floor><Comment></Comment></Config></Device>

<Device numbits="0x24" address="0x00XXXXXX" protocol="VisonicPowerCode" type="Sensor"><Config type="security"><Address>0x00XXXXXX</Address><RFType>VisonicPowerCode</RFType><DeviceType>MagneticContact</DeviceType><xPLSend>true</xPLSend><xPLName>Shed1WaterButtsRight</xPLName><Room>Right Garden</Room><Floor>Ground</Floor><Comment></Comment></Config></Device>
Since the AUX connector is in use, RFXCom will send 2 separate devices with different addresses. xPLRFX now sends xPL messages for each float sensor and xAP Floorplan internally bridges those to xAP BSC messages that look like:
xap-header
{
v=12
hop=1
uid=FFDE3F47
class=xapbsc.event
source=xpl.mal.rfxcom.ahsvmxpl:shed1waterbuttsleft
}
input.state
{
State=Off
Text=normal
DisplayText=normal
Name=shed1waterbuttsleft
}
It’s pretty simple to process these in xAP Floorplan:
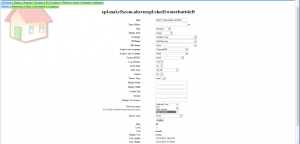
And since I already have a script written to process Visonic MCS sensors, I just needed to add in some additional logic to send appropriate warnings should these sensors be triggered (I’ve shortened the script to show the relevant parts here):
Sub Main()

'get values
stateMCS = getstate(ScriptExtras)
strMCS = split(ScriptExtras,":")(1)

If strMCS = "shed1watterbuttsright" and stateMCS = "on" Then

'send osd message for squeezeboxes
sendxAPSlimServerOSD "Environment: [Alert] - " & formatDate(DAY(date()),2) & "/" & formatDate(MONTH(date()),2) & "/" & YEAR(date()) & " - " & Time, "Shed 1 Water Butts Right are full",  "30", "1", "Immediate", "ersp.slimserver.ahscctvserver:*"

'send email message
sendEmail "XXXXXXXXXXX@XXXXXXXXXXX", "XXXXXXXXXXX@XXXXXXXXXXX", "Environment: [Alert] - " & formatDate(DAY(date()),2) & "/" & formatDate(MONTH(date()),2) & "/" & YEAR(date()) & " - " & Time, "Shed 1 Water Butts Right are full", NULL, NULL, NULL, NULL, NULL, NULL, NULL, "xAP Floorplan", NULL

'send tts message
sendxPLTTS "Environment Alert. Shed 1 Water Butts Right are full.", "100", "VW Kate", "0", "bnz-tts.ahspogoplug3"

'send prowl
sendxAPNotifyProwl "1", "Environment: [Alert]", formatDate(DAY(date()),2) & "/" & formatDate(MONTH(date()),2) & "/" & YEAR(date()) & " - " & Time & " Shed 1 Water Butts Right are full", "ahs.notify.ahssvnserver"

'send nma
sendxAPNotifyNMA "1", "Environment: [Alert]", formatDate(DAY(date()),2) & "/" & formatDate(MONTH(date()),2) & "/" & YEAR(date()) & " - " & Time & " Shed 1 Water Butts Right are full", "ahs.notify.ahssvnserver"

'send growl
sendxAPNotifyGrowl "1", "ahs1.aceshigh.local", "XXXXXXXXXXX", "Environment: [Alert]", formatDate(DAY(date()),2) & "/" & formatDate(MONTH(date()),2) & "/" & YEAR(date()) & " - " & Time & " Shed 1 Water Butts Right are full", "1", "ahs.notify.ahssvnserver"

'send kannel
sendxAPNotifyKannel "1", "ahspogoplug1.aceshigh.local", "13003", "test", "test", "XXXXXXXXXXX", formatDate(DAY(date()),2) & "/" & formatDate(MONTH(date()),2) & "/" & YEAR(date()) & " - " & Time & " Shed 1 Water Butts Right are full", "ahs.notify.ahssvnserver"

End IfEnd Sub
Testing at the float sensor end now sends all the alerts seen in the above script. All in all it works very well! There’s a few tweaks I need to make to the script though – at the moment the alerts will *keep* triggering once the float sensor goes “on”. I really need to set a flag so that the alert only gets sent once, then the flag should get reset once the float sensor goes back to “normal”.
Another job crossed off of the to-do list then! Oh, wait, didn’t I say I had 9 water butts in total? Damn, another 5 to do then 🙁
Thanks for reading,
Martyn Wendon